

THE OFFICIAL WEBSITE OF THE HAMMER’S SLAMMERS
THE CRUCIBLE RULES SYSTEM HANDBOOK


Click thumbnail to enlarge


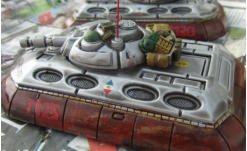
Painting the Slammers Up-Armoured Blowers in 15mm
Spray primer and top coat
After a red automotive primer, Army Painter
Monster Brown primer was sprayed over
everything. The top plenum skirts were then
panel sprayed with a darker Tamiya brown for
variation and then masked out. They were then
stippled with terracotta and orange in a random
mix and hit with some PSC Rust weathering
wash The vehicle hulls were then sprayed with an
automotive silver spray and the figures were
undercoated with Army Painter Desert Sand.
Stowage
After basic painting came the stowage. I bought
pre-painted items from Hobby Master in 1/72nd
(as usual) and added bed rolls and tarps from two
part ‘greenstuff’ putty (which has the advantage
of already being the colour I wanted). I also used
some SF stowage from Darkest Star Games
which I sprayed green and then hit with Army
Painter green ink. Stowage was added into the
new resin turret bustles from Ainsty.
This was glued on and then the shading started.
Dipping
The stowage was washed in Army Painter inks
(especially the raw greenstuff bits I’d made
myself). I used a Future/Klear (floor polish) plus
10% black/brown ink mix and - for a change -
brushed it on rather than dipped the vehicles in it.
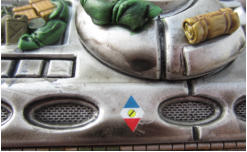
When dry I added the FDF decals from Ainsty.
Matt varnish
After all that work had dried I reached for the
Testors Dullcote. After that metal highlights
were added using Shining Silver and lenses for
vision blocks and lights using Tamiya clear
lacquers.
GO BACK TO PAGE 1

Page 2

GO FORWARD TO PAGE 3

John Treadaway - November 2017


