
THE OFFICIAL WEBSITE OF THE HAMMER’S SLAMMERS
THE CRUCIBLE RULES SYSTEM HANDBOOK


Backing the Hiroseki up were their paid mercenaries. Clark's Commandos are a fairly light force:
fast and mobile with flexible weapon systems but - again - no real match for the TAS and their
brutal HALO tanks. They used some tank destroyers that fired - effectively - buzzbombs that
could penetrate, and some mortar come ATGW launchers that might have an effect but all of the
vehicle that they faced - from both the TAS and the Apex - had Anti-Buzzbomb systems and
some anti-ATGW systems. As the Commandos literally arrived at the rear of the emplaced
Hiroseki forces as the battle commenced, it was obvious that it was gong to be a tough fight...
Placement and Entry
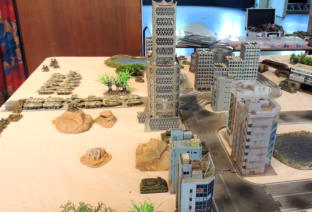
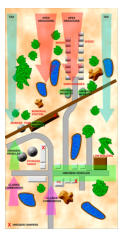
The Hiroseki were positioned across the width of the town taking cover in the city streets, with
infantry hidden (until they opened fire) in forward buildings and (hidden) snipers on roof tops.
The Commandos - led by Colonel Clark himself - were arriving in a column to their rear.
The attackers (Mikes forces under an Apex Colonel with subordinates and the TAS captain)
arrived at the opposite table end, having seen the lie of the land and deployment. The Apex
formed a slow rolling centre while the TAS tore up both left and right table edges.


Fighting on the planet of Testimonial


